This post may contain affiliate links. Please read our disclosure for more info.
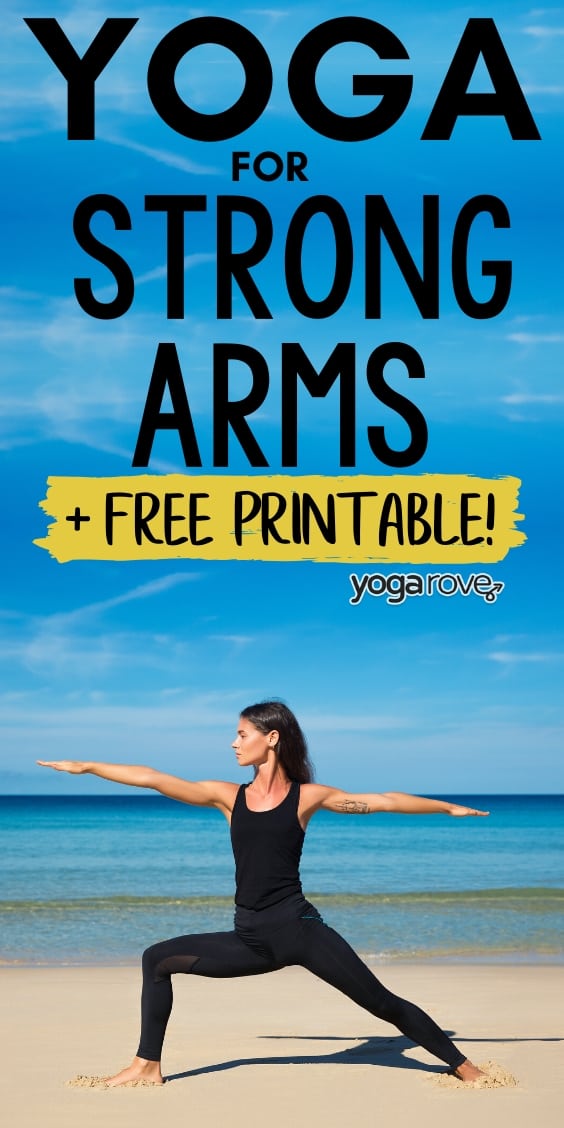
Want to improve the way your arms look, while increasing your strength at the same time? The arms are one part of the body that so many women can’t figure out how to tone. Even if you do tons of cardio, that won’t make flabby arms go away. This yoga routine to tone your arms is quick and will help you get strong, slim arms you’ll WANT to show off.
What causes flabby, untoned arms?
Even if you have just lost a ton of weight, you may be wondering why you seem to carry more weight in your upper arms. This is simply from a lack of lean muscle mass and an excess of fat in the area.
You DON’T need to lift weights to get rid of flabby arms, but you do need to incorporate the right exercises to tone that area.
Did you ever wonder why your yoga teacher or the advanced yogis all have super slim and toned arms? That is because yoga is a body weight based workout, and is amazing at building lean muscle mass, which equals beautiful and sculpted arms!
Who’s this yoga workout for?
- Beginner yogi’s who have down the basics (if you don’t- it’s okay! read this article about the 20 basic yoga poses for beginners)
- People that want a quick equipment-free routine they can do at home
- People looking to tone, strengthen, and improve definition in their arms
To get the most out of this routine, try doing the sequence once, then repeating 3 more times, switching sides.
You can turn this into a 15 or 20 minute routine easily as time goes on by just increasing the amount of time you hold each pose.
This yoga routine will not only tone your arms, but it is also a great workout for blasting belly fat and losing weight!
1. Plank
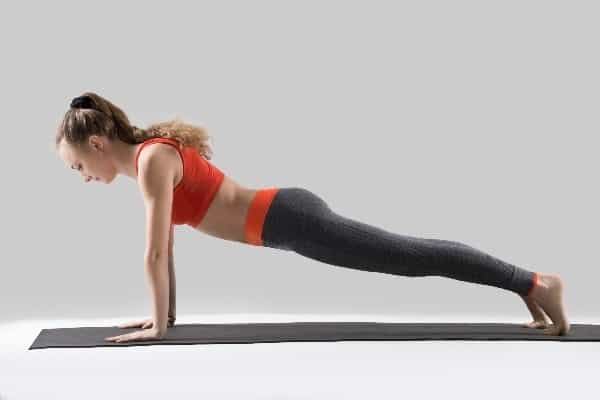
Ah, the infamous plank pose. I think most people have a love/hate relationship with planks. I know they can be really hard when first starting out, but I promise as time goes on, you will learn to love that tightening feeling of your body- that means they’re working!
To do a proper plank, make sure your wrists, hands, and shoulders line up.
Your back should be straight, and you should be engaging your core and legs.
Stay here and hold for 15 seconds. If this is too challenging for you to hold that long, try doing a “half-plank” by placing your knees on the ground. Just make sure you are still engaging your arms and the rest of your body.
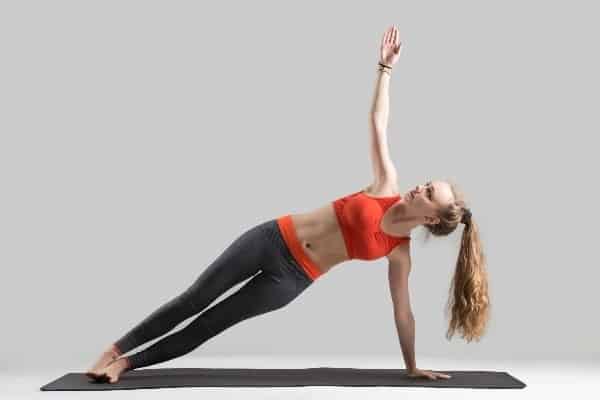
2. Side Plank- Right Side
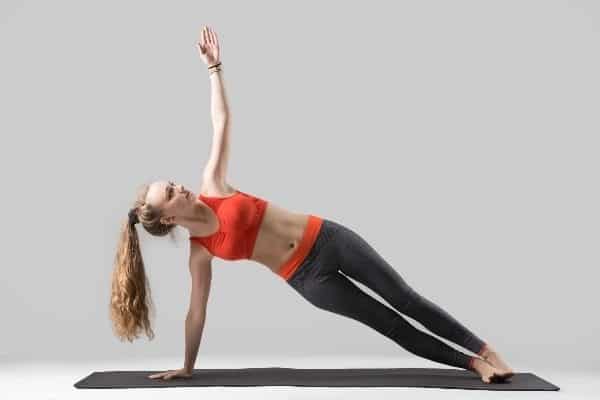
From plank, slowly move into Right Sided Plank by twisting your body to open up to the right side of the room and balancing your left foot on top of your right foot.
You want your shoulders, arms and hands to completely line up here to protect yourself and to get the best workout. Use the side of your right foot to keep your body in alignment.
Also, make sure you are not letting your hips dip and are pulling them up towards the ceiling- told you you’d get a great ab workout in with this one too!
3. Reverse Plank
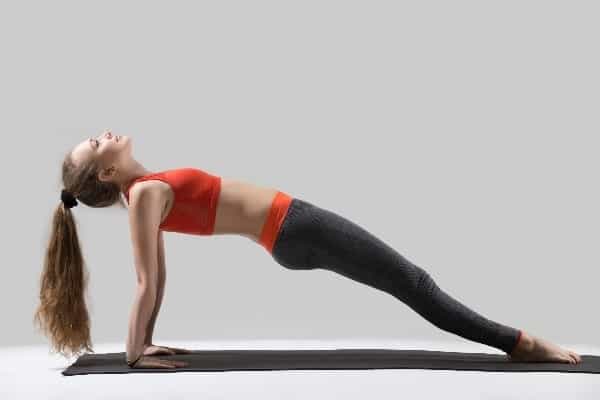
Now come into Reverse Plank by twisting again to come onto both hands with your chest facing the ceiling.
This is a great shoulder strengthener and stretcher, but you will definitely start to feel this in your triceps.
Make sure your hands are facing your feet, and both feet are planted on the ground.
Engage your pelvis to create a flat back and lift through your chest. Let your gaze turn upward.
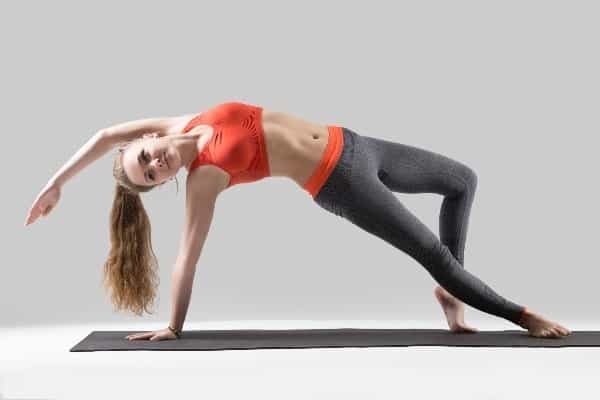
4. Side Plank- Left Side
Now, back to side plank! This time on the left side. That’s one way to get back to the other side! 😉
5. Chaturanga
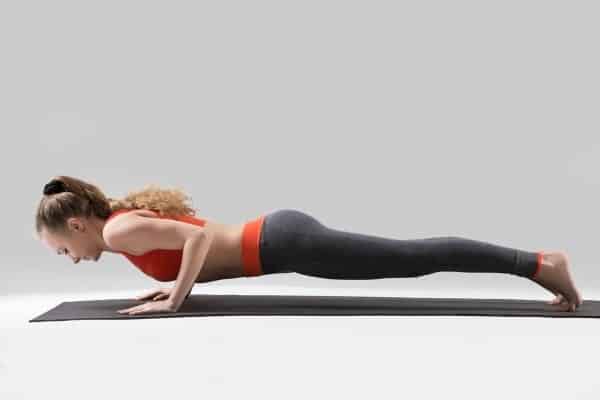
Chaturanga is one of the absolute best yoga poses to do to tone your arms and build upper body strength. If it’s hard for you to do this pose without collapsing, read this article here where I explain how to properly use yoga blocks to build up your strength.
During Chaturanga, you want to make sure your elbows stay tucked in towards your body, you keep your core engaged, and maintain proper form.
You can come straight into Chaturanga from Side Plank or first come into traditional plank and then begin to lower down. Make sure to hover yourself above the ground, don’t completely allow your body to rest!
6. Upward Facing Dog
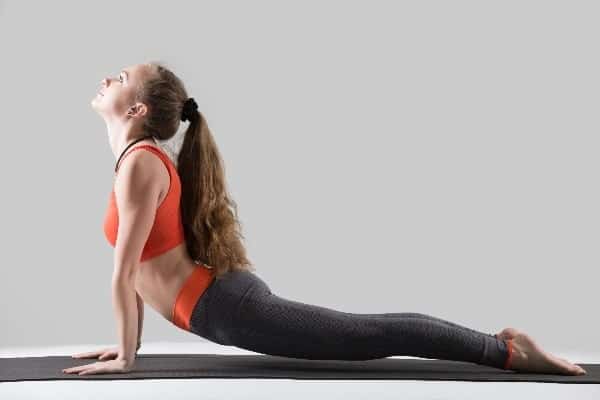
Upward Facing Dog looks similar to Cobra, but it definitely involves more upper body strength, and is great for toning your arms.
As you are hovering in Chaturanga, flip the tops of your feet so they are now touching the ground, then begin to lift up through your arms and chest, and arch your back.
Use your upper body strength to lift everything off of the ground except the tops of your feet. Drop your shoulders from your ears and really lift through your chest.
7. Downward Facing Dog

From Upward Facing Dog, flip the tops of your feet back to a normal position, then send your hips up and back into Downward Facing Dog.
Extend through your heels and really engage your arms, shoulders, and core here.
If you have tight hamstrings, it may feel more challenging to stay in this pose. Try pedaling out your feet one at a time while still engaging your upper body.
8. Wild Thing
Wild Thing is a fun chest opening pose that improves both arm strength and balance.
From Downward Facing Dog, “flip your dog” by lifting up your left leg, and beginning to flip it over to the other side of your right foot, as you pivot your right foot to turn to the other side of the room.
As you are doing this, your left arm will naturally lift and fall to the other side of your body. Reach your left arm towards the front of the room, feeling grounded in your right hand, and lifting through your chest.
9. Downward Facing Dog
From Downward Facing Dog, flip back in Downward Facing Dog.
Stay here for another few breaths to counter your backbend and notice how you feel.
10. Warrior II

You will be surprised at how challenging it is to hold your arms straight out for 15 seconds! Especially after all of the other poses. I think this is a great way to end this sequence because it is a grounding pose that really challenges your stillness while building strength.
From Downward Facing Dog, then smoothly sweep your right leg under your body to in-between your two hands.
Ground through your right foot, and pivot your left foot onto an angle so you can ground through it as well. Once your feet feel strong, use your core to lift up and float your arms straight out onto both sides.
Your right knee should be bent at a 90 degree angle, and your hips should be even.
Make sure your shoulders are completely even with your arms and hands. If you don’t feel a challenge, your arms are probably not linear.
Look over your right fingertips and hold here for 15 seconds.
11. Plank
From Warrior II, cartwheel you hands down by your hands and come back into Plank.
Hold this pose for five breaths, and try to make it ten if you can! After this you will rest.
After you’ve completed your rounds of this sequence, allow yourself to rest in Savasana for as long as you’d like. You’ve earned it :).
After you’ve completed the routine, remember to switch sides as you are repeating it. Allow yourself to rest 30 seconds between sets.
Remember to check out our free Resource Library if you’d like the printable of this routine!
I hope you love it and it helps you get strong, beautiful arms you are proud of!
Comment below to say hi, or let me know any struggles or questions you have!
Ally is a Registered Nurse, Registered Yoga Teacher, and Co-Founder of Yoga Rove with her husband Victor. She first started yoga over 7 years ago when she started her nursing career to combat the physical and mental strain, and now loves to teach and help others.