This post may contain affiliate links. Please read our disclosure for more info.
Holding tension in your shoulders is something that all of us tend to do. Whether it’s spending hours at a computer or staring down at our phones, it is very common to have tightness around the shoulders, neck and upper back. Sometimes simple head rolls just wont suffice and your body may crave a deeper and more relaxing stretch. One of the best poses to practice to release this tension is Thread the Needle.
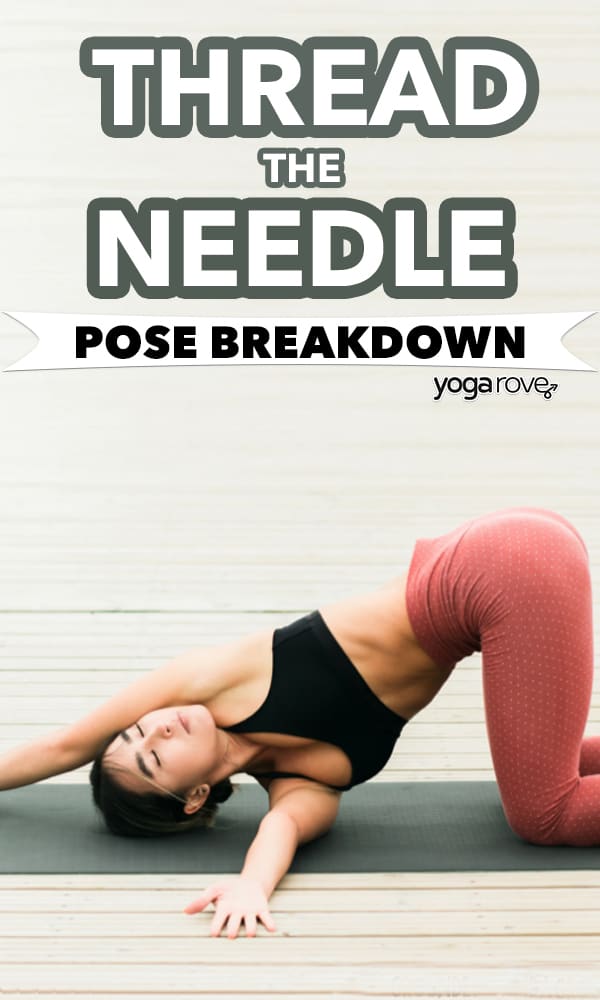
Safe to practice for beginners and advanced yogis alike, Thread the Needle provides a great release for your shoulders and upper back. You can practice this pose not only in your yoga class but whenever you need a little release throughout your day. Our Thread the Needle Yoga Pose Guide provides all you need to know about the pose including modifications, contraindications, and fun variations!
Whether you are looking for a really deep stretch or gentle release, there are many different variations of Thread the Needle that can suit your practice. You can take this pose on your back, in pigeon pose, or from tabletop position. Using your breath, Thread the Needle can provide a great release of tension in the body and if practiced regularly, it can help to ease any chronic shoulder, neck, or upper back discomfort.
Thread the Needle Yoga Pose Benefits
Whether you are warming up or winding down in your yoga practice, this pose always feels really sweet with its deep shoulder stretch. Not only does it feel great but it is also very calming, relaxing, and restorative. Thread the Needle has many variations that you can practice that help to open different parts of your body.
Thread the Needle:
- Opens your shoulders, neck, arms, chest and upper back
- Allows for a light twist in the spine
- Releases upper back and shoulder tension
- Promotes a sense of calm and relaxation in the body
- Stretches your thighs and hips
How to Do Thread the Needle Pose Step by Step
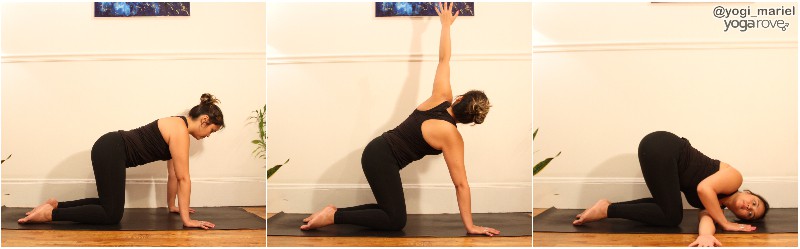
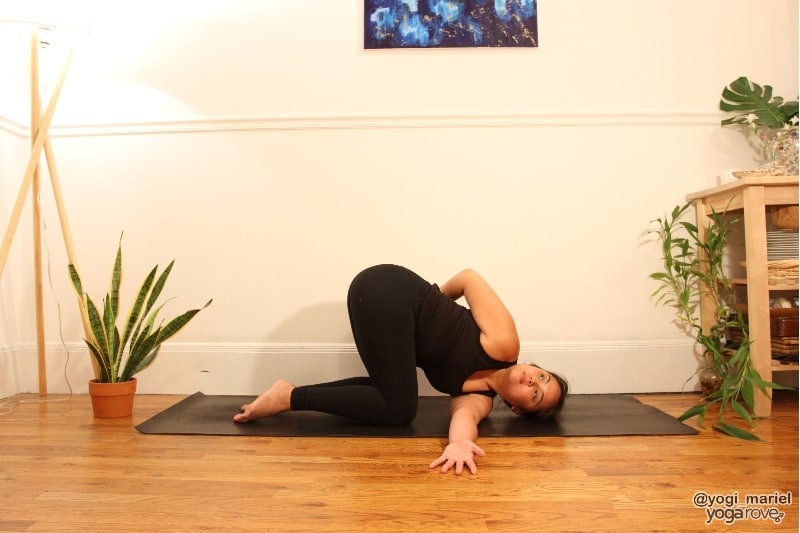
- Begin on your hands and knees. Spread your fingers wide and check that your hands are underneath your shoulders and your knees are underneath your hips. Release your toes back and allow the tops of your feet to rest on the mat.
- Plant your left palm flat on the floor and as you inhale, lift your right hand off the mat and open your body up to the right side of the room. Your fingertips should point up to the ceiling and your right palm and side body opens up to the right.
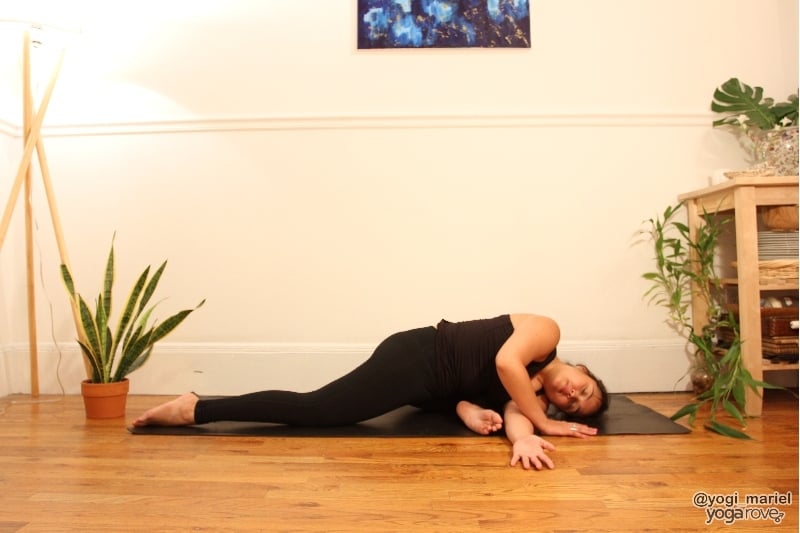
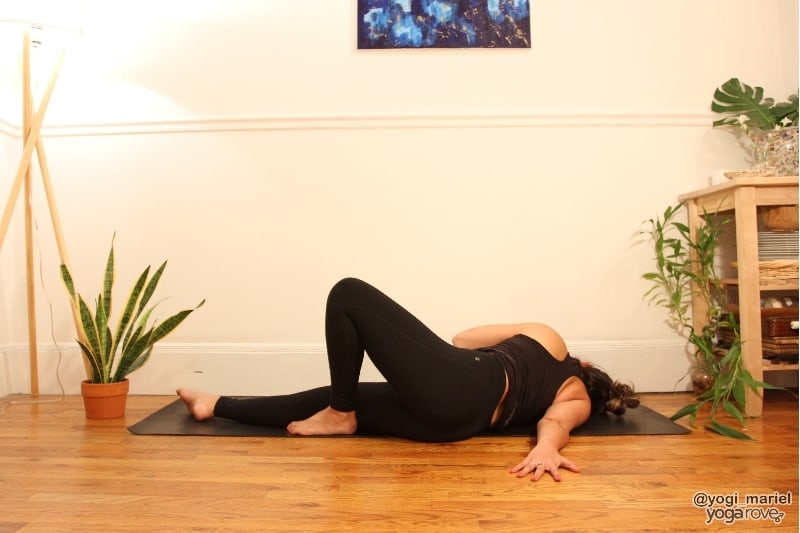
- On your exhale, begin to slide the right arm underneath your left until your right shoulder and ear touch the mat. Place your palm on the floor and relax your fingers to the mat.
- Allow your head to be heavy and make sure that your ear touches the floor. Allow your weight to rest on your right shoulder and ear.
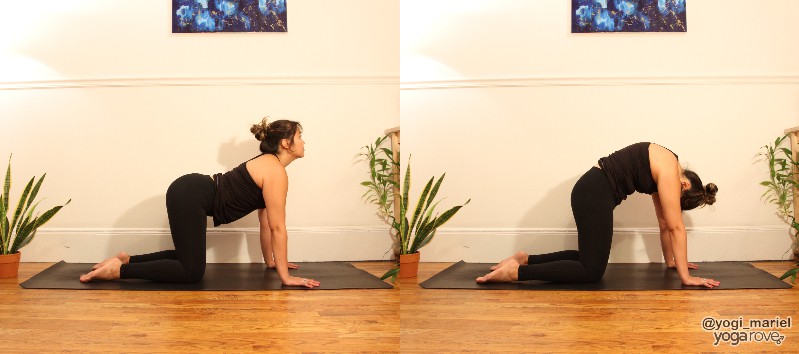
- Reach your right fingertips to the left side of the mat and relax your palm down to the mat. Keep your left palm rooted down to the mat with your elbow bending.
- Stay for 5 deep breaths.
- To come out of the pose, root down with your left palm and inhale to lift the right side body off the mat. Lift the right fingertips up to the ceiling and open your body back to the right side of the room. Exhale to release back onto hands and knees.
- Repeat on the left side.
Modifications for Thread the Needle
Thread the Needle is a relaxing and opening pose, and just like any other pose that you practice, feel free to modify to find more ease in the shape. Depending on your body and your body’s history, it may feel very easy to rest in this pose, but for others, some small modifications may allow you to find more space and comfort in the pose.
- For wrist pain on hands and knees: If you find that your wrists hurt in the starting position of Thread the Needle, place your forearms down on the mat instead of your palms. Once you are in the pose, you can keep your forearm down or you can lift the elbow up and plant your palm flat on the floor.
- For knee discomfort or pain: Fold your mat up or place a blanket underneath your knees in the starting position. The extra cushioning on your knees will ease any discomfort that you may have in the knee joints.
- For more torso support: Place a bolster or rolled up blankets underneath your side body. Rest your ear and torso on the bolster or blankets to allow for more lift in your torso.
- For pregnant women: Practice Thread the Needle at a wall instead. Stand an arm’s distance away from the wall and place your palms flat against the wall. Inhale to lift your right hand up and open your body to the right side of the room. As you exhale, step forward so that you can slide your shoulder and ear to the wall. Keep your left palm flat on the wall as you breath and look toward the left side of the room. Stay for 5 breaths and repeat on the opposite side.
Contraindications of Thread the Needle
If you are nursing any injury in your body, it is always advised to clear any physical activity with your doctor. Thread the Needle is generally a very safe and accessible pose, but always be mindful of your body’s history or how your body feels on any given day.
Take extra caution with Thread the Needle if you have:
- Knee injury
- Neck injury or discomfort
- Shoulder injury or discomfort
- Disk or back injuries
Thread the Needle is a great pose to open the body and relax into, so feel free to modify the pose with the use of blankets or bolsters. Give yourself what you need in the pose so that you can feel the maximum benefits while practicing it.
Prep Poses for Thread the Needle
Thread the Needle is generally found either in the beginning and warm up portion or practice, or toward to the end of class when you begin to wind down. Before you practice this pose, it is always nice to start with some gentler poses to open up the spine, shoulders, and hips.
Try the following poses before coming into Thread the Needle:
- Child’s pose: opens up the hips, softens the shoulders and spine
- Tabletop: sets a strong foundation for Thread the Needle, opens wrists, lengthens spine
- Cat/Cow: warms up the spine, opens the chest and shoulders
- Easy Pose: opens the hips and chest, lengthens the spine
- Interlaced fingers: To open your shoulders, you can interlace your fingers behind your body in your easy pose or a ragdoll forward fold.
Tips for Practicing Thread the Needle
As with any pose that you enter in your practice, it is always important to stay mindful and aware of your breath and your body. Notice how you feel and see if you can find comfort and space while practicing Thread the Needle. Some useful tips include:
- Stay with your Ujjayi breath: If you notice that you breath is becoming shallow or fast, slow it down and connect back to your slow, deep, even breath in and out through your nose.
- Find your Drishti: Notice your gaze when you are in the posture. Are you looking around or focusing very strongly on one point? Allow your gaze to be focused, but soft.
- Broaden your collar: To protect your neck, keep your shoulders down your back and your chest open. Soften your shoulders away from your ears but keep your collar broad.
- Keep your foundation strong and steady: Notice if your hips start to shift when you are in the pose. Keep your hips square and your knees directly underneath your hips.
- Release any unnecessary tension: Maybe you are lifting your shoulders up to your ears or clenching your jaw. Start to become aware of the places that you are holding tension, and allow yourself to release.
Different Variations of Thread the Needle
There are numerous variations to Thread the Needle that you can try during your practice. Some variations are great for building balance and coordination, while others give you a deeper stretch. Next time you are in class and you are practicing Thread the Needle, try these different variations to open up and challenge yourself.
Thread the Needle with Arm Raised
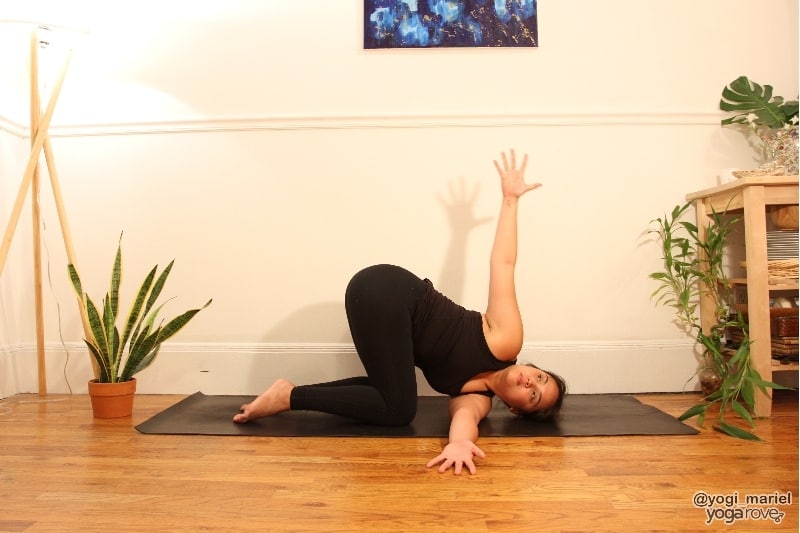
- Once you are in the base pose, instead of keeping your tabletop palm flat on the floor, lift your hand of the mat and open your chest to the side of the room.
- Your fingertips point straight up to the ceiling with your chest opening up to the side.
- Gently roll your shoulder back to open your chest and keep your collar broad.
Thread the Needle with Bind
- Lift your tabletop palm off the mat and reach behind you to grab for your opposite hip or inner thigh.
- Once you have the bind, open your chest up to the side of the room while keep your collar broad and chest open.
Thread the Needle Lifted Leg Variation
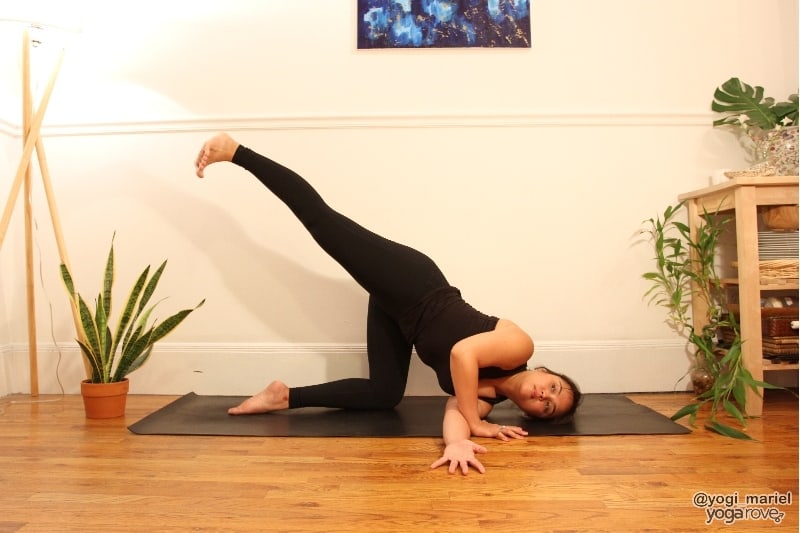
- This variation is the easiest to practice with your tabletop palm flat on the floor. Begin to take your knees in closer together. If you are practicing the right side first (right shoulder on the mat), extend your left leg back as if you are in a high lunge.
- Once your leg is straight, lift your toes of the mat and open your body to the left side of the room.
- Flex your foot, and think of stacking the left hip on top of your right, as if you were in a Half Moon pose.
- You can take this further by lifting your left hand off the mat and extending the arm up to the ceiling, or bending your left knee and catching your foot with our left hand like in Ardha Chandra Chapasana.
Pigeon Pose Thread the Needle
- In your Pigeon Pose you can add a bind that is similar to Thread the Needle. If you are practicing the pose with your right knee in front, plant your left palm flat on the floor, lift the lift hand up and open your body to the left side of the room.
- As you exhale, thread through the right side and rest your left shoulder and ear on the mat.
- Your right palm can stay flat on the floor, or you can reach back for a bind— reaching for your right big toe or inner thigh.
Reclined Thread the Needle
- Lie down on your stomach and place your chin on the mat. Take your arms out in a T-shape with your palms facing down to the floor.
- Lift your right leg up, bend your knee, and place the sole of your foot flat on the mat behind your left leg. As you do this, start to slid your left palm closer to your body until your elbow is bending with your palm flat on the floor.
- The more that you move your weight to the right shoulder and right side of your body, the more intense this pose will feel. You can also try a variation with the arms by interlacing your fingers behind your body. Make sure that you keep a micro-bend in the elbows to avoid hyper extending your elbows.
I hope you found this yoga pose breakdown helpful and try out some of the modifications or variations! Let me know if you do in the comments below 🙂
Related Questions
Is there another pose on the back called Thread the Needle? Reclined pigeon pose is sometimes also referred to as Thread the Needle. This pose opens up your inner and outer hips and relieves tension in the low back.
Can I practice Thread the Needle from child’s pose instead of tabletop? Absolutely! Coming into Thread the Needle is possible from child’s pose and will allow for a deeper stretch. Keep your hips to your heels and your opposite arm extended.
Mariel is a writer and NYC-based yoga teacher. She has been teaching for a decade and is a life-long student of the ancient practice.